

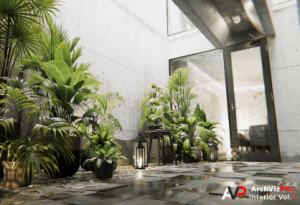
ArchVizPRO Interior Vol.7 HDRP is an architectural visualization project made in HDRP and inspired by the Azuma House. It is a fully navigable building with an interior area composed of 4 main rooms and an outdoor area consisting of a small courtyard, stairs, and walkway.
For more detail this asset from the Unity Asset Store: Click Here
This is a paid asset, but now you can download the “ArchVizPRO Interior Vol.7 HDRP” for FREE, Please keep in mind this package is provided only for learning purposes or to be able to test before buying the product, NOT FOR COMMERCIAL PURPOSES.
ArchVizPRO Interior Vol.7 HDRP v1.2
ArchVizPRO Interior Vol.7 HDRP is an architectural visualization project made in HDRP and inspired by the Azuma House. It is a fully navigable building with an interior area composed of 4 main rooms and an outdoor area consisting of a small courtyard, stairs, and walkway. Build in every single detail from scratch, this interior has more than 200 furniture and props, custom shaders, and 4K texture. All furniture and props are highly detailed and can be reused in any other project. This package supports only HDRP.
Forum Thread / Documentation / Demo_Windows
Features:
– HDRP
– Fully explorable interior
– More than 200 prefabs
– CPU/GPU Progressive ready
– HD 4K Texture
– Post Processing Setup
– Custom Shader Graph Shaders
All buyers will get an automatic 50% discount on the URP version!
Please read the Documentation for quick project setup.
Quick Project Setup
1) Open Unity Hub and create a new Unity 2021.3.4f1 (or higher) project with an High_Definition_RP Template. (If HDRP Template is not available, start from a 3D Template and install HDRP from Package Manager and “Fix All” errors with the “HDRP Wizard”).
2) Download and import ArchVizPRO_Interior_Vol.7_HDRP from Asset Store. If prompt about Unity Package Manager dependencies chose “Install/Upgrade”.
3) Open AssetsArchVizPRO Interior Vol.73D SCENEAVP_Vol.7_Standalone. You should see the scene as in the next screenshot.
4) Go to Edit/Project Settings/Graphics and assign the AVP7_HDRenderPipelineAsset_Standalone in Scriptable Render Pipeline Settings.
5) Go to Edit/Project Settings/Graphics/HDRP Global Settings/ and assign the AVP8_HDRenderPipelineGlobalSettings in Rendering.
6) Go to Edit/Project Settings/Quality and assign the AVP8_HDRP_Settings in Rendering.
HDRP Settings
LIGHT LAYERS:
To improve performances, the project takes advantage of Light Layers.
To each gameobject of a room is assigned a specific layer number, The lights of each room are assigned to the respective layer number.
This ensures that the realtime lights of one room don’t act on other rooms, reducing draw calls and improving performances.
Livingroom: Light Layer 1
Bedroom: Light Layer 2
Studio: Light Layer 3
Meeting Room: Light Layer 4
Courtyard: Light Layer 5
Shader Graph
All custom shaders are made in Shader Graph.
They are located in AssetsArchVizPRO Interior Vol.73D SHADER
Double Sided: A double sided shader
Fabric Rim: A Fabric shader with Rim.
Particles: Particle Shaders compatible with Shuriken Particle System
Rain Ripples: A flipbook shader that Simulates Rain_Ripple. It uses Vertex Color and a Mask texture to control the effect.
Rain Streaks: A flipbook shader that simulates Rain Streaks on glass windows. It uses a Refraction shader.
Vegetation: Shader that controls the wind animation of the plants.
Note. Rain Ripples and Vegetation shaders velocity are controlled by “FunctionRenderTime.cs” script.