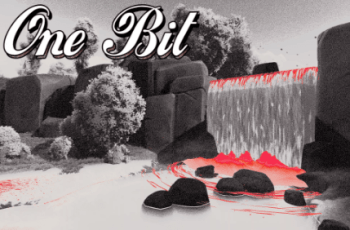
Distinctive and versatile look that uses a dithering algorithm based on Blue Noise, used at the award-winning ‘Return of the Obra Dinn’.
For more detail this asset from the Unity Asset Store: Click Here
This is a paid asset, but now you can download the “Artistic: One Bit” for FREE, Please keep in mind this package is provided only for learning purposes or to be able to test before buying the product, NOT FOR COMMERCIAL PURPOSES.
Artistic: One Bit v2.1.0
✓ Advanced dithering algorithm capable of obtaining a stable noise (Blue Noise).
✓ Dozens of configuration options.
✓ Online color palette search tool.
✓ Included in the ‘Artistic Bundle’.
💡 Online documentation, support and free updates.
💡 Desktop, mobile, VR and web.
💡 Supported by all LTS versions.
💡 Unity 2021.3 or higher.
💡 Universal RP 12.1.7 or higher.
💡 Assets used in video and demo are not included
Get a distinctive look with ‘One Bit’, an original and versatile effect that uses a special type of dithering algorithm based on Blue Noise, similar to that used at the award-winning ‘Return of the Obra Dinn’.
Once installed, when you select your ‘Universal Renderer Data’, you will see something like this:
With ‘Intensity’ (1) you can control the intensity of the effect. If it is 0, the effect will not be active.
‘Edges’ (2) makes it remarked more the edges and ‘Noise’ (2) affects the amount of noise that will appear on the screen. You can change the random seed used to generate the noise with ‘Seed’.
‘Blend’ (4), specifies the formula used to mix the original color of the screen with the effect. They are very similar to those you can find in ‘Photoshop’. With ‘Color’ you can change the way a color (or several) effects the final result. The simplest is ‘Solid’ and its ‘Color’ parameter tints the image. Other modes are ‘Horizontal’, ‘Vertical’ and ‘Circular’ and use two colors in a gradient in different directions.
‘Gradient’ is another mode that uses the brightness of the original pixel to replace it in a color gradient. So the leftmost colors of the gradient would be used for the darker areas of the image and the rightmost colors would be used for the brighter areas. Click on the gradient to modify it to your liking. If the gradient you use does not have dark colors, the result may be too bright, and vice versa. You can modify the brightness range used with ‘Luminance’.
Click on ‘search’ to open the color palette search tool.
Just find a palette you like and click the ‘Use’ button.
In 6, 7 and 8 you can modify the color range in each channel. Small values in these fields can create a ‘retro’ effect.
When ‘Invert’ (9) is activated, the color is inverted.

