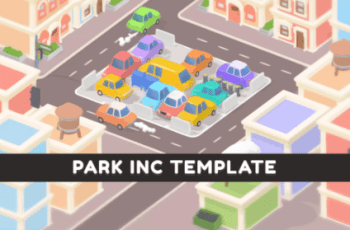
This fully customizable puzzle template. Swipe over cars to clean the parking area! The perfect starting point for your next hit!
For more detail this asset from the Unity Asset Store: Click Here
This is a paid asset, but now you can download the “Park Inc | Template + Editor” for FREE, Please keep in mind this package is provided only for learning purposes or to be able to test before buying the product, NOT FOR COMMERCIAL PURPOSES.
Park Inc | Template + Editor v1.5.1
Description
Park Inc is a complete game from Watermelon Games.
This fully customizable puzzle template. Swipe over cars to clean the parking area! The perfect starting point for your next hit!
OUR ADVANTAGES
🧑🏻💻 Discord support
🗃️ Detailed documentation
🛠️ Easy-to-use tools
🎨 Customization Guides
✨ Clean structure and code
How to change an environment
Import the custom assets into the project
Go to Assets/Park Inc/Game/Prefabs/Environments
Open an existing prefab or duplicate it and open it. You will see the following structure
Inside each side environment, there are props you should change in order to reskin the product. Due to the transition between levels, it is mandatory to have all props inside its designated side environment. Roads and parking field game objects should not be placed on any side environment
Link new obstacles to EnvironmentProductBehavior
It’s important to have the same order that you have in Level Editor
How to add levels
Select Level Editor (“Tools – Level Editor”)
Select the “Levels” tab
Scroll to the bottom and press “+” to add a new level
Resize the level to your liking using “X” and “Y” fields
Click on a car or an obstacle icon, then drag it to the desired destination and click again to place it. You can always change its position or remove it simply by dragging it away from the level field and clicking. in order to rotate an object press the right mouse button
How to change an environment
Import the custom assets into the project
Go to Assets/Park Inc/Game/Prefabs/Environments
Open an existing prefab or duplicate it and open it. You will see the following structure
Inside each side environment, there are props you should change in order to reskin the product. Due to the transition between levels, it is mandatory to have all props inside its designated side environment. Roads and parking field game objects should not be placed on any side environment
Link new obstacles to EnvironmentProductBehavior
It’s important to have the same order that you have in Level Editor
How to change car models
Import the custom assets into the project
Go to the “Assets/Park Inc/Game/Prefabs/Movable Objects/Skin_x” folder
You can backup folder in case something goes wrong
Select car prefab you want to change -> double click to open it
You can replace the existing car model object “PG_car_3x6” with a new model (just drag n drop it inside the prefab). Make sure the new model has a similar size as the previous model (you can use a scale to make it fit well)
Alternatively you can modify “PG_car_3x6” object itself, changing mesh and material.
You can create as much skin folders as you need by simply duplicating folders and changing models.
TEMPLATE INCLUDES
🚕 150 unique levels
🏘️ Easy-to-use level editor
🛒 Store with cars and environment
🏗️ Game look customization:
🔹 Cange and add locations
🔹 Detailed documentation
💰 Monetization:
🔸 Admob
🔸 Unity Ads
🔸 IAP
📱 IOS/Android optimized

